Boiling an egg is often the very first thing we learn in the kitchen, yet it remains one of the most debated topics. This guide provides a scientific approach to achieving the perfect egg every time.
1. Quick Summary: The Essential Checklist
Before you start, ensure you have these basics ready:
- Eggs: Preferably 7–10 days old for easier peeling.
- Water: Enough to cover eggs by at least 1 inch.
- Pot: A heavy-bottomed saucepan for even heat.
- Timer: Essential for precision.
- Ice Bath: A bowl with 50% ice and 50% water.
2. The Definitive Egg Timing Chart
Use this table to choose your desired yolk consistency. These timings are based on the “Hot Start” method (dropping eggs into boiling water).
| Boiling Time | Yolk Description | Best For… |
| 6 Minutes | Liquid gold, very runny | Dipping toast soldiers |
| 7 Minutes | “Jammy” and custardy | Ramen bowls & Avocado toast |
| 8 Minutes | Soft-set but creamy gold | Protein-packed salads |
| 10 Minutes | Fully set, bright yellow | Standard breakfast/Snacks |
| 12 Minutes | Firm and light yellow | Deviled eggs & Egg salad |
| 14+ Minutes | Very hard and dry | Grating over dishes |
3. Comparing Methods: Cold Start vs. Hot Start
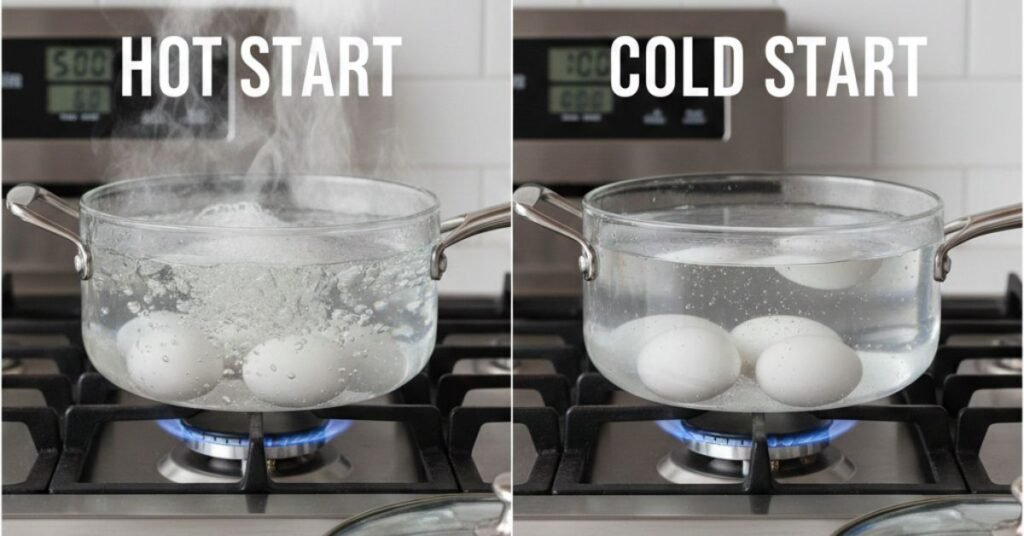
Which method should you use? Here is a quick comparison:
Cold Start Method
- How: Eggs and water start cold together.
- Best for: Preventing cracks in thin-shelled eggs.
- Drawback: Harder to time; shells often stick to the white.
Hot Start Method (Recommended)
- How: Eggs are lowered into already boiling water.
- Best for: Easy peeling and precise timing.
- Drawback: Eggs may crack if dropped too quickly.
4. Step-by-Step Instructions
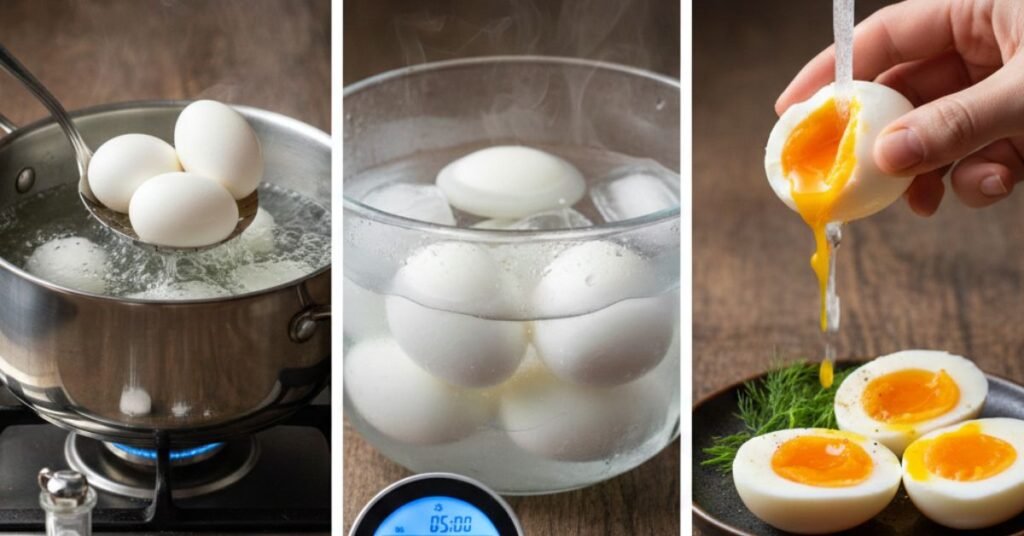
Follow these bulleted steps for a flawless result:
- Boil the Water: Fill your pot and bring it to a rolling boil.
- Lower the Heat: Turn it down to a simmer so the eggs don’t bounce and break.
- Add Eggs: Use a slotted spoon to gently place eggs in the pot.
- Set the Timer: Turn the heat back up and start your timer immediately.
- Prepare Ice Bath: While boiling, set up your bowl of ice and water.
- Shock the Eggs: Once the timer dings, move eggs to the ice bath for 10 minutes.
5. Pro-Tips for “Easy-Peel” Success
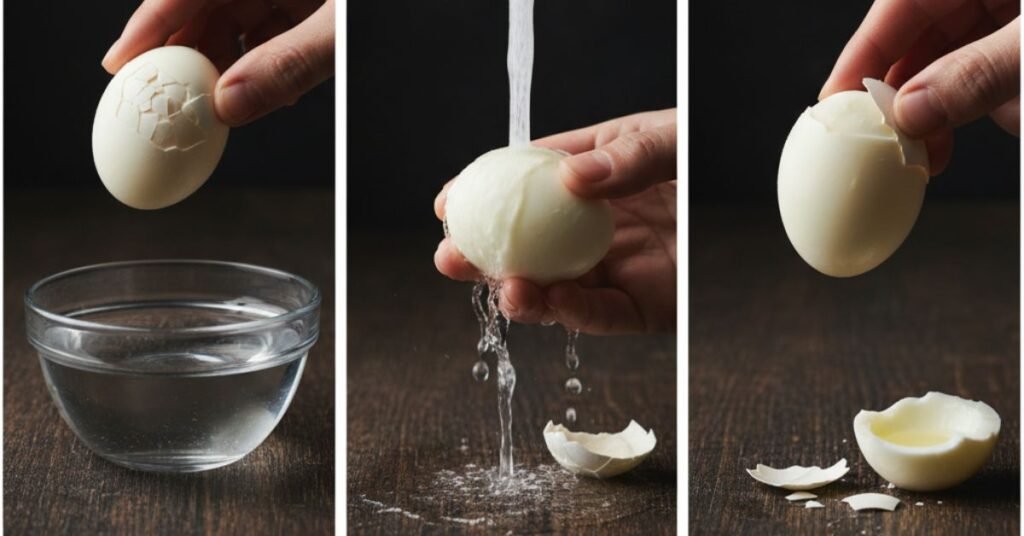
If you struggle with shells sticking to the whites, try these expert hacks:
- The Tap and Roll: Gently tap the egg on a hard surface and roll it under your palm to create dozens of tiny cracks.
- The Water Flow: Peel the egg under cold running tap water; the pressure helps lift the membrane.
- The Bottom-First Rule: Always start peeling from the wider end of the egg (where the air pocket is).
- Vinegar Hack: Add 1 tbsp of white vinegar to the boiling water to help the whites set faster if a crack occurs.
6. Troubleshooting Common Mistakes
Are your eggs not coming out right? Check these common issues:
- Greenish Yolk? You overcooked it. Reduce timing by 1–2 minutes.
- Egg Phat Gaya (Cracked)? Use room-temperature eggs instead of cold fridge eggs to avoid thermal shock.
- Rubbery Whites? The water was boiling too violently. Use a gentle simmer instead.
7.Conclusion
Mastering the boiled egg is about Control. By using a timer and an ice bath, you take the guesswork out of the process. Whether you want a “Jammy” Ramen egg or a firm egg for your salad, these steps ensure success every single time.
8. Frequently Asked Questions (FAQs)
- Can I boil eggs in an Air Fryer? Yes! 250°F (120°C) for 15 minutes usually yields a hard-boiled egg.
- How long do they stay fresh? * In Shell: 7 days in the fridge.
- Peeled: 2 days in a sealed container.
- Why do some eggs float? If an egg floats in raw water, it’s old and has too much air inside. It’s best to discard it.