prepslim.com

Author name: Kiran

The Ultimate Guide to the BRAT Diet: How to Heal an Upset Stomach
Weight Loss & Diet Plans

The Ultimate Guide to the BRAT Diet: How to Heal an Upset Stomach

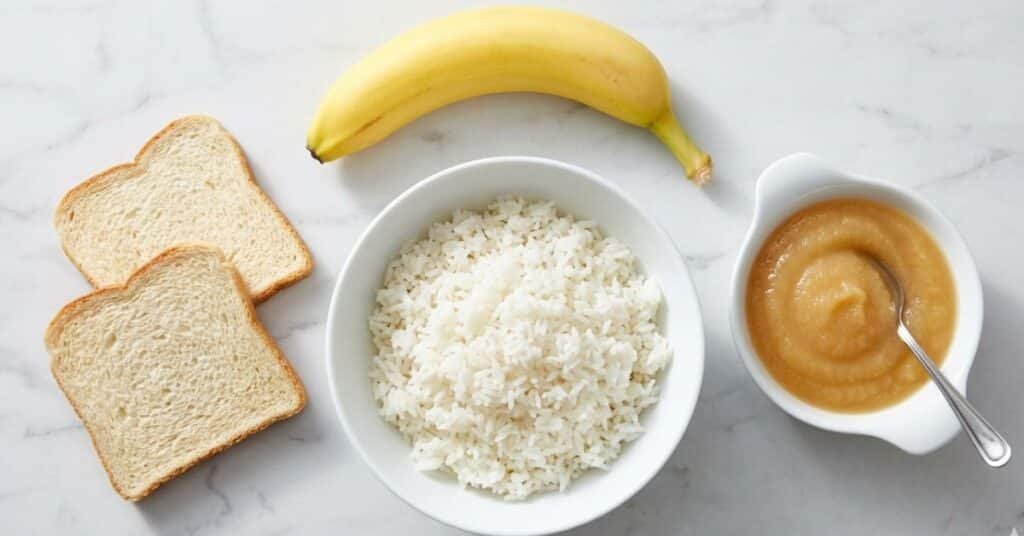
Having an upset stomach is a terrible feeling. Whether you have the stomach flu, food poisoning, or just ate something bad, you just want to feel normal again. When your tummy is sick, eating normal food is a bad idea. Your body needs a break. For many years, doctors and moms have used a simple trick to help sick stomachs. It is called the BRAT diet. In this easy guide, we will learn exactly what this diet is, how it works, and how you can use it to feel better fast. Nutritionist’s Personal Tip: When my own stomach feels weak, I always go back to the basics. A small bowl of plain white rice with a tiny pinch of salt is my go-to remedy. It is gentle, gives you quick energy, and really makes a difference in how fast you bounce back! What is the BRAT Diet? The word “BRAT” is a short way to remember four specific foods. These four foods are very easy to digest. They do not make your stomach work hard. Here is what the letters stand for: Why Does the BRAT Diet Work? You might wonder why these four foods are so special. It all comes down to how your body digests food. 1. They Are Low in Fiber Fiber is normally very healthy, but not when you are sick. High-fiber foods make you go to the bathroom more. BRAT foods are low in fiber. This helps “bind” your stomach and stops diarrhea. 2. They Are Bland Foods Bland foods have no strong smells or spicy tastes. When you feel like throwing up (nausea), strong smells can make it worse. Bland foods keep your stomach calm. 3. They Give Gentle Energy When you are sick, you still need energy to heal. These foods are full of simple carbohydrates. Carbohydrates give you quick energy without making your digestive system tired. Nutrition Facts Breakdown Here is a simple table showing why each food is helpful for your recovery: BRAT Food Item Why It Helps Your Stomach Key Nutrient Bananas Very easy to chew; replaces lost minerals. Potassium White Rice Low in fiber; helps stop diarrhea quickly. Simple Carbohydrates Applesauce Smooth to swallow; gentle natural sugar. Vitamin C & Pectin White Toast Acts like a sponge to absorb stomach acid. Starch Step-by-Step Guide: How to Follow the BRAT Diet You cannot just eat BRAT foods all day right away. You need to follow a slow and safe plan. Here is the best sequence to follow: Phase 1: Clear Liquids (Hours 0 to 6) When you first get sick, do not eat solid food. Your stomach needs to rest. Phase 2: Add BRAT Foods (Hours 6 to 24) If you have stopped throwing up and can keep water down, you can start eating. Phase 3: Return to Normal Foods (Day 2 and 3) The BRAT diet is not meant to be used for a long time. It does not have enough protein or healthy fats for your body. After 24 to 48 hours, you should try adding other gentle foods. Foods You MUST Avoid When you are healing, some foods will make you feel much worse. You must stay away from these items until you are 100% better: When to Call a Doctor Most of the time, an upset stomach will go away on its own. However, you should call your doctor right away if: (FAQs) 1. How long should I stay on the BRAT diet? You should only follow the strict BRAT diet for 24 to 48 hours. Your body needs vitamins, protein, and fats from other foods to get completely healthy. 2. Can I put butter or jam on my toast? No. Butter is a dairy product and has a lot of fat. Jam has too much sugar. Both of these can make your stomach hurt again. Eat your toast completely plain. 3. Is it okay to eat eggs on this diet? Not right away. Wait until Phase 3 (the second or third day). When you do eat eggs, try them plain and scrambled with no butter or milk. 4. Is the BRAT diet safe for babies and toddlers? Doctors used to tell parents to use the BRAT diet for kids. Now, doctors say kids should go back to their normal, healthy diet as soon as they can. Always ask your child’s doctor before putting them on any strict diet. 5. What is the best thing to drink? Water is great, but your body also loses salt when you are sick. Clear broths, coconut water, or special drinks like Pedialyte are the best choices to keep you hydrated. Disclaimer: The information provided in this blog post is for educational purposes only. Consult your doctor before starting any diet plan or if your symptoms do not improve.
Easy Lunch Meal Prep: Simple Guide for Busy Weeks
meal prep

Easy Lunch Meal Prep: Simple Guide for Busy Weeks

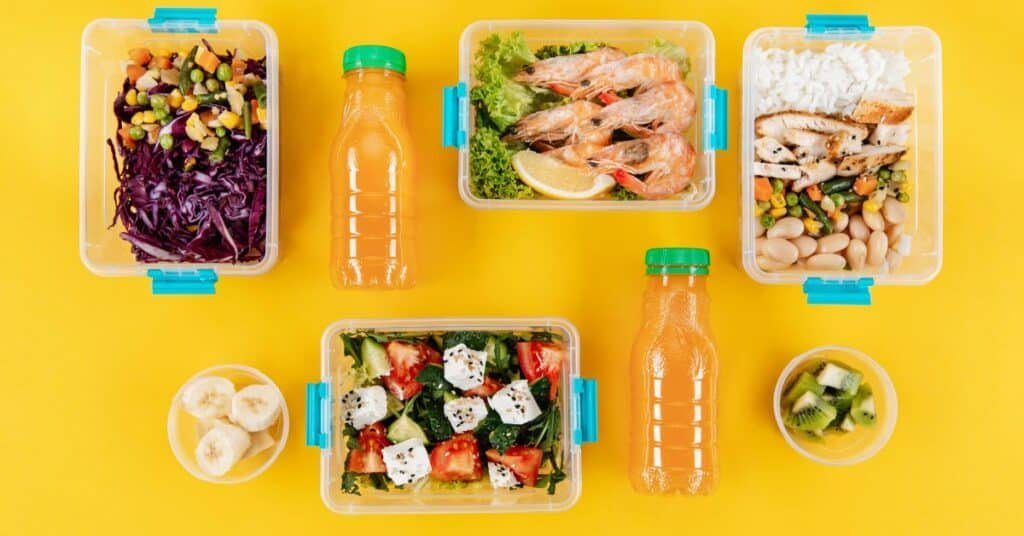
As a professional nutritionist, I know that a busy schedule is often the biggest hurdle to healthy eating. I created this guide to show you that nutritious eating doesn’t have to be complicated or time-consuming. By following these simple meal prep strategies, you can fuel your body effectively while saving precious time and energy. My goal is to help you simplify your nutrition so you can focus on what matters most. Kiran, Nutritionist & Content Creator Tired of the morning rush and daily lunch dilemmas? Easy lunch meal prep can transform your life. This simple technique helps you save time, money, and energy every week while maintaining healthy eating habits. In this article, we’ll share practical tips, recipes, and strategies to help you become a meal prep master. The Rise of Meal Prep Culture In recent years, meal prep has evolved from a niche fitness trend to a mainstream lifestyle choice embraced by busy professionals, students, and families alike. Social media platforms are filled with colorful meal prep containers and inspiring transformation stories. What makes this movement particularly powerful is its accessibility you don’t need to be a professional chef or have expensive equipment to start. With just a few basic containers and some planning, anyone can join the meal prep revolution and experience its transformative benefits. Why Easy Lunch Meal Prep Works for Everyone Meal prep isn’t just a time-saving hack; it improves your overall lifestyle. With weekly meal planning, you prepare yourself for a busy workweek. When you spend 2-3 hours on Sunday doing meal prep, your entire week becomes stress-free. The Triple Benefits of Meal Prepping Benefit Category What You Save Real Impact Time 30-45 min daily 2.5-3.5 hours per week Money $5-8 per lunch $100-150 per month Health 300-500 calories Better portion control From a financial perspective, lunch meal prep is extremely budget-friendly. Daily takeout or restaurant meals can cost 8-12 dollars per day, while homemade meal prep lunches cost only 3-5 dollars per serving. The health benefits are also quite significant. When you prepare your own meals, you can maintain portion control and use fresh, wholesome ingredients. Essential Tools and Pantry Staples For successful meal prep, having the right tools and ingredients is essential. Invest in airtight glass containers or BPA-free plastic containers that are microwave-safe and leak-proof. Mason jars are perfect for salads because they keep greens crispy. Must-Have Items Storage Containers: Pantry Staples Checklist Category Items to Stock Shelf Life Grains Quinoa, brown rice, pasta 6-12 months Proteins Canned beans, tuna 2-5 years Healthy Fats Olive oil, nuts, seeds 6-12 months Flavor Boosters Sauces, spices, herbs 1-3 years Stock your pantry with grains like quinoa, brown rice, and whole grain pasta. Canned beans and lentils are affordable protein sources. For fresh produce, keep pre-washed greens, cherry tomatoes, bell peppers, and cucumbers. Simple Meal Prep Formulas You Can Follow Meal prep doesn’t need to be complicated. The perfect grain bowl formula is simple: choose ½ cup cooked grain, add 3-4 oz protein, include vegetables, add healthy fats, and serve with dressing. The Perfect Grain Bowl Formula Step-by-Step Assembly: Build-Your-Own Salad Blueprint For wraps and sandwiches, use whole grain tortilla or bread, apply healthy spread, add protein filling, include fresh veggies, and complete with flavor additions. Easy No-Cook and Cold Lunch Options If you don’t have microwave access or prefer cold lunches, mason jar salads are a favorite choice. Follow the layering technique: dressing at the bottom, then hard vegetables, beans or grains, soft vegetables, and greens on top. Protein-Packed Snack Additions Don’t underestimate the power of adding protein-rich snacks alongside your main lunch. Hard-boiled eggs prepared in advance, individual portions of hummus with veggie sticks, Greek yogurt with berries, or homemade energy balls can complement your meal and keep you satisfied throughout the afternoon. These mini additions take minimal prep time but significantly boost the nutritional value and satiety factor of your lunch. Plus, they’re perfect for those days when you need an extra energy boost before an important meeting or workout. Mason Jar Salad Layering Guide Popular Cold Lunch Ideas: Smart Storage and Food Safety Tips Proper storage is the key to meal prep success. Cooked grains stay fresh for 4-5 days. Cooked proteins are safe for 3-4 days. Cut vegetables can be stored for 3-5 days. Food Freshness Timeline Food Type Refrigerator Freezer Cooked grains 4-5 days 2-3 months Cooked proteins 3-4 days 2-3 months Cut vegetables 3-5 days Not recommended Soups and stews 3-4 days 3-4 months Essential Food Safety Rules: Common Meal Prep Mistakes to Avoid Even experienced meal preppers occasionally fall into certain traps. One common mistake is choosing overly complicated recipes that require too many ingredients or steps stick to simple, streamlined recipes, especially when starting out. Another pitfall is not accounting for taste fatigue; eating identical meals five days in a row can lead to burnout. The solution? Prep two or three different recipes instead of just one. Finally, many beginners forget to factor in reheating time and access to microwaves. If you work in a place with limited kitchen facilities, prioritize cold lunch options or invest in a good quality thermos for hot meals. (FAQs) Q1: How long can I safely store meal-prepped lunches? Most meal-prepped lunches can be safely stored for 3-4 days in the refrigerator. Cooked grains can last up to 5 days, while salads with dressing should be consumed within 2-3 days. Q2: What type of containers should I use? Both glass and plastic containers work well. Glass containers are microwave-safe and don’t absorb odors. BPA-free plastic containers are lightweight and portable. Q3: Can I meal prep if I don’t like eating the same food? Try the component meal prep method. Prep individual ingredients that can be mixed and matched throughout the week for variety. Q4: How much money can I save with meal prep? Meal-prepped lunches cost $3-5 per serving compared to $8-12 for takeout. This translates to savings of $100-150 per month. Q5: Do I need to reheat my meal-prepped

The Best Keto Bread Recipe: How to Enjoy Bread While Losing Weight
Recipes

The Best Keto Bread Recipe: How to Enjoy Bread While Losing Weight

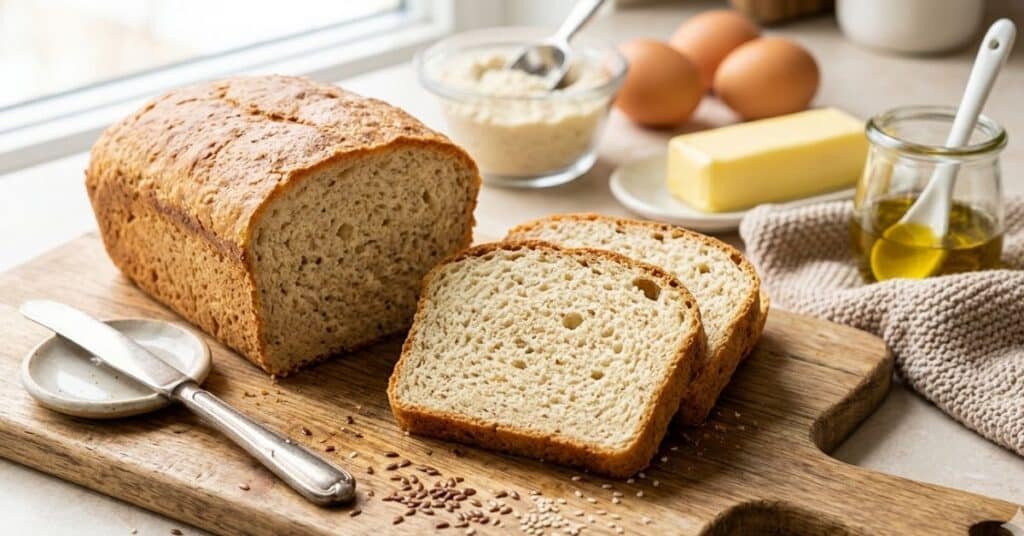
Hi everyone!  I am Kiran, and as a professional nutritionist, the number one thing people tell me is: “I want to lose weight, but I just cannot live without bread!” I completely understand you. Bread is cozy, delicious, and makes life easy when you want a quick sandwich. But regular bread is full of carbs. Those carbs can stop your weight loss goals right in their tracks. That is why I am so excited to share my favorite keto bread recipe with you today. This weight loss bread is healthy, very tasty, and perfect for keeping you on track. Let’s dive into everything you need to know about making the perfect loaf at home. What exactly is Keto Bread? Most bread that you buy at the store is made from wheat flour. Wheat flour is packed with carbohydrates. When you eat carbs, your body turns them into sugar. If you are on a keto diet, your main goal is to eat very few carbs so your body burns fat instead of sugar. Keto bread is a special type of bread made without wheat. Instead, it uses low-carb ingredients. It is a gluten-free keto bread, which means it is very gentle on your stomach. It does not make you feel bloated, tired, or heavy like regular white bread does. Regular Bread vs. Keto Bread To show you why this is so important, look at this simple comparison: Feature Regular White Bread Homemade Keto Bread Main Ingredient Wheat Flour Almond Flour Carbs per Slice 15 to 20 grams Less than 2 grams Blood Sugar Spikes very quickly Stays nice and steady Gluten Yes (Can cause bloating) No (Gluten-free) Fiber Very low High and healthy Why You Will Love This Low-Carb Bread Recipe There are so many reasons to make this bread. Here are the top benefits for your body and your taste buds: The Secret Ingredients We Use To make this amazing bread, we have to swap regular flour for smarter choices. Here is what you need for easy keto baking: Kiran’s Personal Nutrition Tip My Secret for the Best Texture: Always use room-temperature eggs! If you take eggs straight out of the cold fridge and mix them with melted butter, the butter will get hard and chunky. Take your eggs out of the fridge 30 minutes before you start baking. This simple trick makes the bread so much softer! Step-by-Step Instructions Making this bread is so simple. You do not need any fancy machines, and you do not have to wait hours for the dough to rise. Step 1: Prepare Your Pan and Oven First, turn on your oven to 180°C (350°F) to let it get hot. Take a standard loaf pan and line the inside with parchment paper. This paper is magic,it stops the bread from sticking so it pops right out! Step 2: Mix the Dry Ingredients In a large, clean bowl, add your almond flour, baking powder, and a tiny pinch of salt. Use a whisk or a fork to stir it well. Make sure there are no hard lumps in the flour. Step 3: Mix the Wet Ingredients In a different bowl, crack your eggs. Beat them really well until they are light yellow. Slowly pour in your melted butter (make sure it is not boiling hot!) and your apple cider vinegar. Mix it all together. Step 4: Bring It All Together Now, slowly pour your wet egg mixture into the bowl with your dry almond flour. Use a spoon to gently stir it. Keep stirring until it looks like a thick, smooth cake batter. Step 5: Time to Bake! Pour your batter into your loaf pan. Use a spoon to make the top nice and flat. Put it in the oven for 35 to 40 minutes. You will know it is perfectly cooked when the top turns a beautiful golden brown color. You can also poke a toothpick into the middle; if it comes out clean, your bread is done! Step 6: Let It Cool Down I know it smells amazing, but do not cut it yet! Let the bread sit in the pan for 10 minutes, then take it out and put it on a wire rack. Let it cool down completely. If you cut it while it is hot, it will crumble and fall apart. Nutrition Table (Per Slice) As a nutritionist, I know how important it is to track what you eat. Here is the exact breakdown for one slice of this homemade bread: Nutrient Amount per Slice Calories 90 kcal Net Carbs 1.8 grams Protein 4.2 grams Total Fat 7.5 grams Fiber 2.0 grams Just think: A regular piece of bread has around 15 grams of carbs. This one has less than 2 grams! How to Serve and Enjoy Your Keto Bread Now that you have baked your wonderful bread, how should you eat it? Here are my favorite ways: Storage and Meal Prep Guidelines Because this bread does not have any fake chemicals or preservatives in it, it will go bad if you leave it on the kitchen counter for too long. Final Thoughts Losing weight and getting healthy does not mean you have to give up the foods that make you happy. You just need to learn how to make smarter, healthier versions of them. This keto bread is a true game-changer. It is fast, simple, and packed with nutrition. Try baking a loaf this Sunday during your meal prep. I promise it will make your diet so much easier and a lot more fun! (FAQs) 1. Why did my bread turn out too wet or mushy? This usually happens if you do not bake it long enough, or if you cut it while it is still hot. Always wait until it is completely cool before slicing! 2. Can I use coconut flour instead of almond flour? No, please do not swap them directly! Coconut flour drinks up a lot more water than almond flour. If you use the

How to Cook Perfect Rice in the Microwave: The Ultimate Fluffy Guide
Recipes

How to Cook Perfect Rice in the Microwave: The Ultimate Fluffy Guide

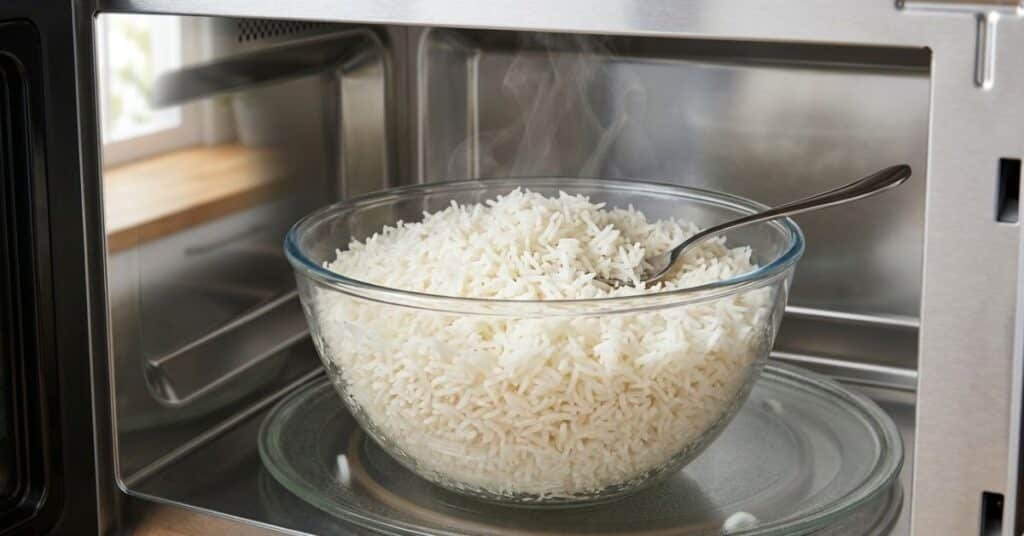
If you think making rice is difficult or takes too much time, I have a secret to share with you. For a long time, I used to stand by the stove, worrying about the rice burning or turning into a sticky mess. But one busy weeknight, I decided to try making microwave white rice. To my surprise, it came out perfectly fluffy! Since then, this easy microwave rice recipe has become a lifesaver in my kitchen. Whether you are meal-prepping for the week or just need a quick side dish, learning how to steam rice in the microwave will save you time and effort. In this guide, I will show you exactly how to get perfect results every single time without using a stovetop. Let’s get started! Why Cook Rice in the Microwave? You might be wondering why you should use a microwave instead of a regular pot. Here are a few simple reasons: The Golden Rule: Microwave Rice Water Ratio The ultimate secret to getting fluffy rice in the microwave is measuring the exact amount of water you use. Guessing the water amount is the number one reason rice fails. Different types of rice need slightly different amounts of liquid to cook properly. Here is a handy table showing the perfect microwave rice water ratio: Rice Variety Amount of Dry Rice Amount of Water Required Long-Grain White Rice 1 Cup 1.5 Cups Basmati Rice 1 Cup 1.5 Cups Jasmine Rice 1 Cup 1.25 Cups Brown Rice 1 Cup 2.5 Cups (Cook time varies) Nutritionist Tip: If you prefer your rice to be a little softer for digestion, you can increase the water by 1/4 cup. However, the ratios above generally provide the perfect, non-mushy texture. Step-by-Step Instructions Follow these highly detailed, simple steps for the perfect bowl of rice. Step 1: Rinse the Rice Thoroughly (Do Not Skip!) Put your dry rice in a fine-mesh strainer and wash it directly under cold running water. Use your fingers to move the rice around. Keep washing for about 1 to 2 minutes until the water coming out of the bottom runs completely clear. This removes the surface starch that makes cooked rice gummy and sticky. Step 2: Combine the Ingredients Transfer the freshly washed rice into your large, deep microwave-safe bowl. Add the exact measured amount of water (refer to the ratio table above). Add a pinch of salt for flavor. I also highly recommend adding 1 teaspoon of olive oil, coconut oil, or a tiny bit of butter. The fat coats the grains and completely stops them from sticking together. Stir it very gently just to mix. Step 3: Microwave Uncovered (The Boiling Phase) Place the heavy bowl into the microwave. Do not put the lid on yet! Cook the rice uncovered on HIGH power for exactly 10 minutes. During this time, the water will boil rapidly. After 10 minutes, most of the liquid should be absorbed by the grains, and you will see small “steam holes” on the surface of the rice. Step 4: Cover and Microwave (The Steaming Phase) Now, carefully take the bowl out or just reach in and cover the bowl with your microwave-safe plate or vented lid. Set your microwave to MEDIUM power (or exactly 50% power level). Microwave for another 4 to 5 minutes. This gentle, lower heat steams the inside of the grains perfectly without burning the bottom. Step 5: Let It Rest (The Secret to Perfection) This is the most important step that people often ignore! When the microwave timer stops, do not open the door. Leave the covered bowl inside the microwave for a full 5 minutes. The trapped residual steam will finish cooking the core of the rice gently and allow the moisture to distribute evenly across all grains. Step 6: Fluff and Serve Carefully remove the bowl using oven mitts (it will be extremely hot). Take off the lid, avoiding the hot steam. Take a fork and gently fluff the rice from the outside edges pulling toward the center. You are now ready to serve the most perfect, beautiful rice! Essential Equipment You Will Need Before we start cooking, make sure you have the right tools ready. You do not need anything expensive, just a few basic kitchen items: Flavor Hacks: Making Your Rice Healthier and Tastier Eating plain white rice can sometimes get boring. As a nutritionist, I love finding ways to add flavor and nutritional value to simple dishes. Try these quick additions before you start microwaving: Troubleshooting Common Microwave Rice Problems Even with instructions, sometimes things go wrong. Here is how to fix common issues: Nutrition Information Being mindful of what we eat is crucial. Rice provides excellent, fast-digesting carbohydrates that give your brain and muscles instant energy. When paired with a good protein source and vegetables, it forms a perfectly balanced meal. Nutrient Amount (Per 1 Cup Cooked Standard White Rice) Calories 205 kcal Carbohydrates 45g Protein 4.2g Fat 0.4g Dietary Fiber 0.6g Note: Nutritional values can vary slightly depending on the exact brand and type of rice used. 📊 Calculate Your Macros Now Final Thoughts Mastering how to make rice in the microwave is an incredible kitchen trick that absolutely anyone can achieve. It is highly efficient, consistently fast, and delivers exceptional results for your healthy daily meals. Try this straightforward method the next time you need a hassle-free side dish, and let me know how it turns out in the comments below! (FAQs) Q1: Can I cook brown rice using this exact method? No, brown rice requires significantly more water and much more cooking time because it still has its tough outer bran layer. To cook brown rice, you will need 2.5 cups of water for 1 cup of rice, and it will take about 25-30 minutes on medium power. Q2: Do I need to soak the white rice before microwaving? For standard white, Jasmine, or Basmati rice, soaking is completely optional. While soaking for 15 minutes can make the grains slightly

The Ultimate Guide to Healthy Chick-fil-A Options: A Nutritionist’s Top Picks
meal prep

The Ultimate Guide to Healthy Chick-fil-A Options: A Nutritionist’s Top Picks

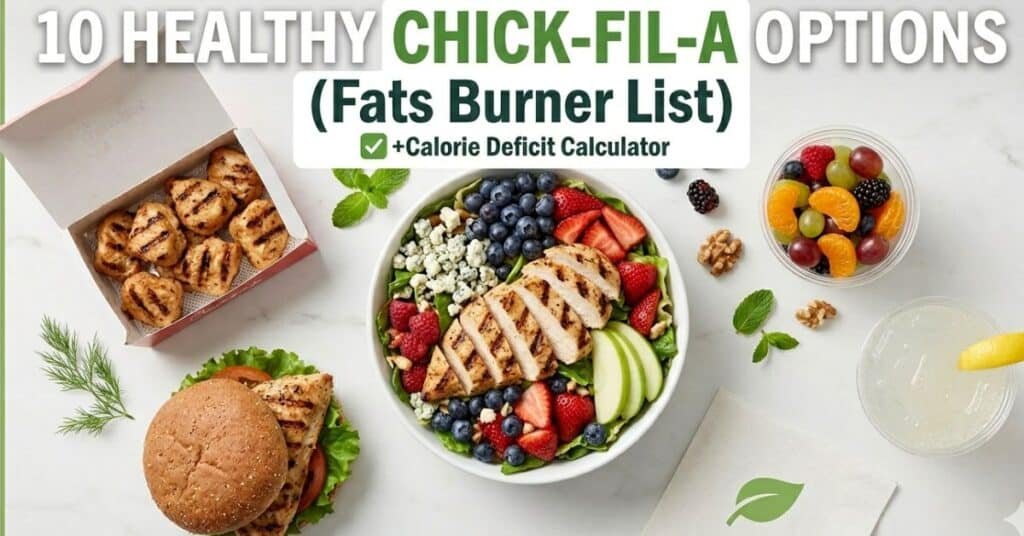
prepslim.com When you are living a busy life, cooking every single meal at home is not always possible. Eventually, you will find yourself in a drive-thru line wondering what to order. A common misconception is that eating fast food automatically ruins your diet and sets back your health goals. But does it really have to? Absolutely not. Finding healthy fast food options is entirely possible if you know what to look for and how to customize your order. As a nutritionist, I am constantly analyzing restaurant menus to help my readers make better choices. Chick-fil-A stands out in the fast-food industry because of its commitment to quality ingredients, fresh produce, and highly customizable menu. Whether your goal is to build lean muscle mass, maintain your current weight, or drop a few pounds, having a reliable Chick-fil-A diet menu strategy can be a total lifesaver. In this comprehensive guide, we are going to break down the best menu items to keep your calories low and your protein high. Let’s dive into the ultimate list of low-calorie fast food choices that actually taste great. 1. High-Protein Breakfast Choices A productive day begins with a solid, nutritious breakfast. Skipping heavy, greasy breakfast sandwiches and opting for a protein-packed meal will stabilize your blood sugar and provide sustained energy. This is especially important if you are following modern health trends like the 30-30-30 rule, which emphasizes getting 30 grams of protein early in the morning. 2. The Core Entrées: Grilled vs. Fried When you are searching for weight loss fast food, the golden rule is always the same: choose grilled over fried. The breading and deep-frying process add significant amounts of hidden saturated fats, sodium, and empty calories that can hinder your progress. 3. Nutrient-Dense Salads and Sides Many people assume salads are automatically healthy, but that is not always true. However, Chick-fil-A offers some genuinely nutritious side options that allow you to skip the heavy waffle fries. 4. The Hidden Calories: Dressings & Sauces You can order the healthiest grilled chicken salad on the menu, but if you drench it in the wrong dressing, you can easily add 300 to 400 unnecessary calories. Being mindful of condiments is a crucial part of eating out. Smart Sauce Choices (Use These): Sauces to Avoid or Limit: Calculate My Calories 5. Nutrition Table: At a Glance To make your next drive-thru visit as easy as possible, I have created this quick reference cheat sheet. Save this table so you always know your macros: Menu Item Calories Protein (g) Carbs (g) Fat (g) Egg White Grill 290 26 30 8 Greek Yogurt Parfait 270 13 36 9 Grilled Nuggets (8-ct) 130 25 1 3 Grilled Chicken Sandwich 380 28 44 12 Grilled Chicken Cool Wrap 350 42 29 13 Market Salad (No Dressing) 330 29 26 13 Kale Crunch Side 120 3 8 9 Fruit Cup (Medium) 60 1 15 0 6. Editor’s Note: My Personal Strategy As a nutritionist who is constantly testing recipes and writing content for prepslim.com, I need meals that won’t cause a mid-afternoon energy crash. Heavy, carb-loaded fast food usually makes me feel sluggish and unmotivated. When I am pressed for time, my absolute favorite go-to order is the 8-count Grilled Nuggets paired with a Kale Crunch Side and a large Diet Lemonade. This entire meal comes out to just 250 calories and provides 28 grams of high-quality protein. It is incredibly filling, satisfyingly crunchy, and keeps my focus sharp so I can get back to work without feeling weighed down. Conclusion      Eating on the go does not mean you have to surrender your health goals. By making smart, informed choices like opting for grilled proteins, swapping fries for greens, and being careful with heavy dressings you can easily enjoy a delicious meal that supports your fitness journey. Remember, consistency is key, and having a plan before you reach the drive-thru speaker is half the batt (FAQs) Q: Is Chick-fil-A healthy for weight loss? Yes, it certainly can be! Weight loss ultimately comes down to maintaining a calorie deficit. Because Chick-fil-A offers grilled chicken options, fresh fruit, and low-calorie salads, it is very easy to build a meal that fits into a strict weight loss plan. Q: What is the lowest calorie item at Chick-fil-A? If we are looking at side items, the lowest calorie option is the small Fruit Cup, which has only 45 calories. If we are looking at entrées, the 8-count Grilled Nuggets are the lowest at just 130 calories. Q: Are Chick-fil-A waffle fries healthy? While they are delicious and cooked in canola oil, waffle fries are still a deep-fried carbohydrate. A medium order contains 420 calories and 21 grams of fat. They are fine as an occasional treat, but if you are eating for health and weight loss, swapping them for the Kale Crunch Side or a side salad is a much better everyday choice. Q: Can I eat Chick-fil-A on a keto or low-carb diet? Absolutely. The Grilled Nuggets contain only 1 gram of carbohydrates, making them perfectly keto-friendly. You can also order the Grilled Chicken Sandwich without the bun, or get a side salad and use the Light Italian dressing to keep your net carbs extremely low. Q: What is the best healthy drink to order? Always try to avoid liquid calories. Sugary sodas provide zero nutritional value. The best options are plain water, Unsweetened Iced Tea (0 calories), or the famous Diet Lemonade, which uses Splenda and contains only 15 calories for a medium cup. Disclaimer: The information provided in this blog is for educational purposes only. Consult your doctor before starting any diet plan.

The Ultimate 2-Ingredient Cottage Cheese Flatbread Recipe: A Complete Guide
Recipes

The Ultimate 2-Ingredient Cottage Cheese Flatbread Recipe: A Complete Guide

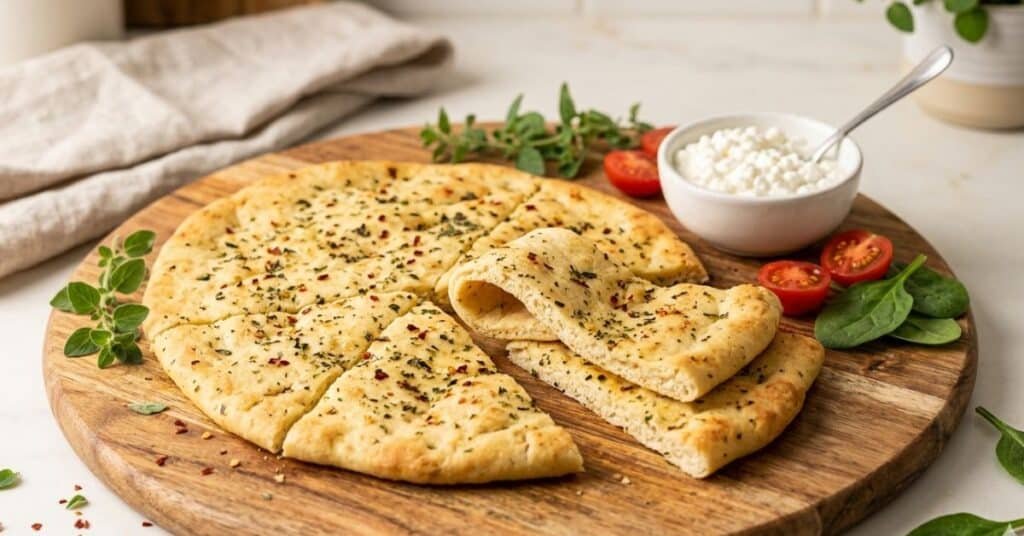
If you are looking for a healthy, guilt-free bread alternative that actually tastes amazing, you have landed in the perfect place. Giving up bread is often the hardest part of any health or weight loss journey. As a nutritionist, I am constantly testing new ways to help people enjoy their favorite meals without feeling deprived. Recently, the viral TikTok cottage cheese recipe has taken the internet by storm, and I knew I had to test it thoroughly right here for the prepslim.com community. Let me tell you, the results completely exceeded my expectations! Whether you need a sturdy, low carb wrap for your afternoon lunch or a quick snack base, this recipe is a total game-changer. It is incredibly easy to make, packed with wholesome nutrients, and will never leave you feeling heavy or bloated. In this comprehensive guide, I will walk you through exactly why this works, how to make it perfectly every single time, and how to avoid the common mistakes people make. Why This Recipe Works (A Nutritionist’s Perspective) Replacing regular white or wheat bread with a high protein keto bread alternative can do wonders for your energy levels, digestion, and fitness goals. Here is why I highly recommend adding this flatbread to your weekly meal prep: What You Need: Ingredients and Substitutions You only need two main ingredients to create the base of this amazing flatbread. I also highly recommend adding some spices to elevate the flavor. The Core Ingredients Optional Spices (Highly Recommended) Plain cottage cheese and eggs can taste a bit bland on their own. Adding a few simple spices makes it taste like a premium, savory wrap. Ingredient Substitution Guide If you are missing something or want to experiment, here is a quick table of easy substitutions: Original Ingredient Best Substitute Resulting Texture/Flavor Full-Fat Cottage Cheese Low-Fat Cottage Cheese Slightly thinner flatbread, less flexible Large Eggs Liquid Egg Whites (1/2 cup) Lighter color, more firm texture Garlic Powder Fresh Minced Garlic Stronger, more savory flavor profile Italian Seasoning Everything Bagel Seasoning Crunchy texture, perfect for breakfast Step-by-Step Instructions for the Perfect Flatbread Follow these simple, detailed steps to get the perfect flexible gluten-free flatbread every single time. Step 1: Prep the Oven and Baking Pan Preheat your oven to 350°F (180°C). Take a standard baking sheet and line it completely with parchment paper.Pro Tip: Spray a very light coat of olive oil or cooking spray on the parchment paper. Even though parchment paper is non-stick, this extra step ensures your flatbread will slide right off without tearing. Step 2: Blend the Ingredients Smooth In a high-speed blender or a food processor, add the cottage cheese, the two large eggs, and all your chosen spices. Blend the mixture on high speed for about 30 to 45 seconds. You want the mixture to be completely smooth and liquid. If you leave cheese lumps, your bread will have a bumpy texture and might break. Step 3: Pour and Spread Evenly Pour the smooth batter directly onto your lined baking sheet. Use a silicone spatula to spread it out evenly into a large rectangle or a circle. Pay close attention to the thickness. If it is too thin, it will turn into a crispy cracker. If it is too thick, it will be spongy. Aim for about 1/4 inch of thickness. Step 4: Bake to Golden Perfection Place the tray in the middle rack of your oven and bake for 25 to 30 minutes. You will know it is completely done when the edges turn a beautiful, crispy golden brown and the center is firm to the touch. It should not look wet or jiggly. Step 5: Cool Before Peeling This is the most critical step of the entire recipe! Let the flatbread cool down on the counter for at least 10 to 15 minutes before you touch it. As it cools, it firms up. Once it is cool to the touch, gently and slowly peel the parchment paper away from the back of the bread. Common Mistakes and Troubleshooting First time making this? Don’t worry! Here is a helpful table showing the most common mistakes and how to fix them easily: The Problem Why It Happened How to Fix It Next Time Flatbread tastes too “eggy” Lack of seasoning or using very large eggs. Add more savory spices like garlic, onion, or paprika to mask the egg flavor. It is stuck to the paper Forgot to grease the paper, or used wax paper instead of parchment. Always use true parchment paper and lightly spray it with cooking oil before pouring. It cracked when rolling The batter was spread too thin, or it was overbaked. Spread it slightly thicker next time and take it out as soon as the edges brown. It is too soft/wet Underbaked or not allowed to cool completely. Bake for 5 more minutes. Always let it cool for 15 minutes to set properly. Creative Ways to Serve Your Flatbread This versatile recipe can be used in so many delicious ways. Here are a few of my favorite meal prep ideas: Nutrition Information Here is a detailed look at the approximate nutritional value. This data is for the entire recipe (1 large flatbread, which counts as 1 serving). Nutrient Amount per Serving Total Calories 160 kcal Protein 18 g Total Carbohydrates 4 g Dietary Fiber 1 g Net Carbs 3 g Total Fat 10 g Sodium 380 mg Final Thoughts Making the switch to healthier alternatives does not mean you have to sacrifice taste. This 2-ingredient cottage cheese flatbread is living proof that eating healthy can be delicious, easy, and satisfying. Give this recipe a try this week, and don’t forget to let me know in the comments below what fillings you used to make it your own! Happy cooking and healthy eating! (FAQs) 1. Can I use fat-free cottage cheese for this recipe? Yes, you can! However, fat-free cottage cheese has a higher water content and less fat, which means your flatbread

The Ultimate Guide: 5 High Protein Ninja Creamy Recipes for Weight Loss
Recipes

The Ultimate Guide: 5 High Protein Ninja Creamy Recipes for Weight Loss

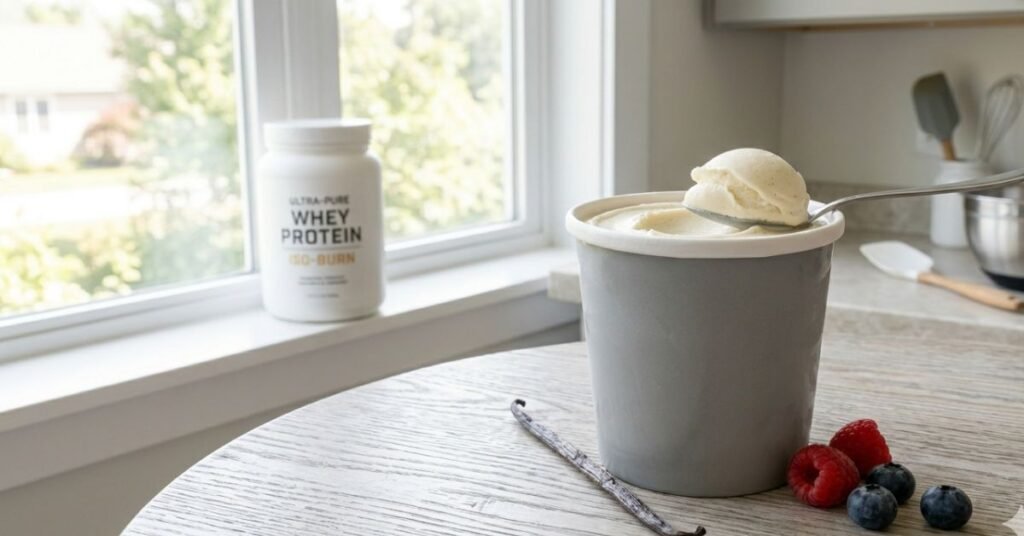
Hi everyone, welcome to Prepslim! I’m Kiran, and as a professional nutritionist, one of the most common questions I get from my clients is how to handle sweet cravings without ruining their diet. We all want to reach our fitness goals, but giving up ice cream entirely is simply not sustainable. That is exactly why I invested in a Ninja Creami, and it has completely changed the way I look at dessert. After months of testing different bases, protein powders, and mix-ins in my own kitchen, I have perfected the art of making rich, creamy, and macro-friendly treats. Today, I am sharing my ultimate guide to healthy ice cream alternatives that actually taste like the real deal. Let’s dive in! Why the Ninja Creamy is a Game-Changer When we talk about Ninja Creamy weight loss strategies, we are really talking about the power of “volume eating.” Volume eating means you can consume a large portion of food that keeps you incredibly full, but for very few calories. Most store-bought protein ice creams on the market are expensive, and unfortunately, many of them have a chalky, icy texture. The magic of this machine lies in its unique blade technology. Instead of churning liquid, it shaves frozen solid blocks into a remarkably smooth texture. This gives you total control over your ingredients, making it the absolute best tool for creating sugar-free protein desserts that fit seamlessly into your daily nutrition plan. The Anatomy of the Perfect Protein Base Creating a bakery-style creamy base is easy once you understand the core components. You do not need heavy cream or massive amounts of sugar. You only need three main parts: 📊 Calculate Your Macros Now My Top 5 High-Protein Recipes Here is a collection of my absolute favorite, heavily tested low calorie Ninja Creamy recipes. They take less than 5 minutes to prep! 1. The Vanilla Bean Dream This is the ultimate classic recipe. It is delicious on its own but also serves as the perfect blank canvas for any mix-ins you want to add. Ingredients: Step-by-Step Instructions: Nutrition Profile: Metric Amount Calories 220 kcal Protein 38g Carbs 12g Fats 2g 2. Triple Chocolate Peanut Butter If you love peanut butter cups, this recipe is designed for you. It is incredibly rich, chocolatey, and packed with fuel for your muscle recovery. Ingredients: Step-by-Step Instructions: Nutrition Profile: Metric Amount Calories 210 kcal Protein 33g Carbs 9g Fats 6g 3. Strawberry Cheesecake Fluff Fresh, fruity, and incredibly thick. The addition of cheesecake pudding makes this taste like a decadent slice of real New York cheesecake! Ingredients: Step-by-Step Instructions: Nutrition Profile: Metric Amount Calories 230 kcal Protein 35g Carbs 15g Fats 2g 4. Mint Chocolate Chip Refreshing and perfectly sweet, this flavor is a massive hit during the warmer months. Ingredients: Step-by-Step Instructions: Nutrition Profile: Metric Amount Calories 195 kcal Protein 26g Carbs 8g Fats 7g 5. Salted Caramel Cookie Dough A sweet and salty masterpiece that will easily satisfy your late-night dessert cravings. Ingredients: Step-by-Step Instructions: Nutrition Profile: Metric Amount Calories 280 kcal Protein 42g Carbs 18g Fats 6g The “Science” of the Spin: Pro Tips for Success To ensure you get a professional, bakery-level texture every single time, keep these expert guidelines in mind: Conclusion Eating healthy and staying on track with your fitness goals does not mean you have to give up your favorite sweet treats. By taking a few minutes to prep these high protein Ninja Creamy recipes, you are providing your body with the nutrition it needs while fully satisfying your cravings. I highly recommend starting with the Vanilla Bean Dream. Once you master that base, the flavor possibilities are endless! Which recipe are you going to try first? Let me know! (FAQs) Here are some of the most common questions I receive regarding healthy ice cream prep: 1. Can I use water instead of milk for these recipes? While you technically can, I strongly advise against it. Water lacks the fat and protein needed to create a creamy texture, resulting in an icy, flavorless slush. Unsweetened almond milk is a much better low-calorie alternative. 2. Why is my ice cream coming out powdery? Powdery ice cream usually means your mixture lacks fat or liquid. As mentioned in the pro tips, simply add a splash of milk (about 1 tablespoon) and use the “Re-Spin” function. 3. Is the machine extremely loud? Yes, it is quite loud—similar to a high-powered blender. The spinning process takes about 2 to 3 minutes, so it is best not to run it late at night if people are sleeping nearby! 4. How long do leftovers last in the freezer? Leftovers can last for weeks! If you don’t finish your pint, use a spoon to smooth out the top so it is flat again, put the lid back on, and store it in the freezer. When you are ready to eat it, you will need to run it through the machine on the “Lite Ice Cream” cycle again. 5. Can I use regular instant pudding instead of sugar-free? Absolutely. If you are not strictly tracking calories or carbs, regular instant pudding mix works perfectly and acts as an excellent thickener. Disclaimer: Consult your doctor before starting any diet plan.

The Ultimate Crispy Air Fryer Salmon Bites: A 10-Minute Healthy Recipe
Recipes

The Ultimate Crispy Air Fryer Salmon Bites: A 10-Minute Healthy Recipe

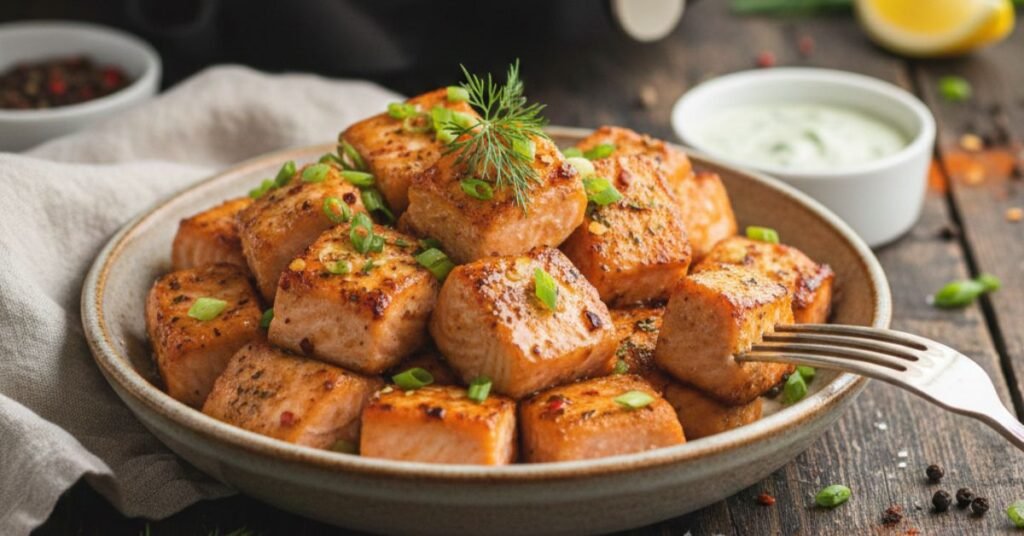
Title Idea: Crispy Air Fryer Salmon Bites – The Best 10-Minute Dinner Category: Dinner / Healthy Recipes / Air Fryer Prep Time: 5 Mins | Cook Time: 8 Mins | Total Time: 13 Mins Introduction Editor’s Note: > “I personally developed this recipe because I believe healthy eating shouldn’t feel like a chore. I’ve updated this post with new step-by-step images and expert tips to ensure you get that ‘perfect crisp’ every single time. Whether you’re on a keto diet or just need a 10-minute dinner, this is my top recommendation for you!” If you are looking for a dinner that tastes like a restaurant meal but takes less effort than ordering pizza, you are in the right place. Air Fryer Salmon Bites have become a viral sensation on the internet, and honestly, they deserve all the hype. We all have those busy weeknights where we want something healthy but don’t have the energy to cook a complicated meal. Maybe you are trying to eat better, or maybe you just bought an air fryer and want to test it out. Whatever the reason, this recipe is a game-changer. I have always looked for healthy alternatives to fast food that don’t sacrifice flavor. When I first experimented with air frying salmon in bite-sized pieces, I was amazed that I could achieve a restaurant-quality crust in just 10 minutes. Today, this has become a staple in my kitchen for busy weeknights, and I am confident it will become your new favorite go-to meal as well. In this guide, I am going to teach you how to make the juiciest, most flavorful salmon bites in under 15 minutes. This isn’t just another recipe; it is a complete guide based on real kitchen testing. I will explain why this method works, the exact science behind getting that crispy texture, and how to avoid dry, rubbery fish. Whether you are looking for easy air fryer recipes for beginners or a low carb seafood dinner, this guide has everything you need. Why This Recipe Works (The Science) You might be wondering, “Why should I cut the salmon into cubes? Why not just cook the whole fillet?” Here is the secret: Surface Area. When you cook a whole fillet, only the top gets seasoned and crispy. But when you cut the salmon into bite-sized pieces (or air fryer salmon nuggets), every single side gets coated in oil and spices. The hot air from the air fryer hits all sides of the cube, creating a 360-degree crust while keeping the inside buttery and soft. Benefits of Air Frying vs. Oven Baking Here is a quick comparison to show why the air fryer wins for this specific recipe: Feature Air Fryer Traditional Oven Cooking Time 8–10 Minutes 20–25 Minutes Texture Super Crispy & Golden Often Soft or Steamed Oil Usage 1 Tablespoon (Low Fat) 2–3 Tablespoons Preheating 2 Minutes 10–15 Minutes Energy Use Uses less electricity Heats up the whole kitchen Ingredients You Will Need To make this dish, you don’t need fancy ingredients. You likely have most of these in your pantry already. 1. The Salmon (The Star of the Show) For the best results, buy fresh salmon fillets. 2. The Oil You need a little bit of fat to help the heat conduct and make the spices stick. 3. The Best Seasoning for Salmon This is where the magic happens. While you can buy store-bought mixes, making your own is healthier and tastier. Here is my go-to mix: Step-by-Step Instructions Follow these steps exactly, and I promise you will get perfect results every time. Step 1: Prep the Fish Take your salmon fillets out of the fridge. Using a sharp knife, carefully remove the skin if it is still on. Cut the salmon into 1-inch cubes. Expert Tip: Try to cut them into the same size. If some are big and some are small, the small ones will burn before the big ones are cooked. Step 2: The “Dry” Technique Before adding oil, pat the salmon cubes dry with a paper towel. This removes excess moisture. If the fish is wet, it creates steam in the air fryer, and you won’t get that crispy edge. Step 3: Seasoning Place the cubes in a large bowl. Drizzle with 1 tablespoon of olive oil. Sprinkle your seasoning mix over the top. Toss the bowl gently until every piece looks well-coated. Step 4: Air Frying For Prep: “Pro-Tip: When patting the salmon dry, ensure there is absolutely no moisture left on the surface. This is the secret to getting that golden, crispy crunch without using extra oil.” For Tossing: “Gentle Reminder: Toss the cubes gently in the bowl so you don’t break the delicate fish before it hits the air fryer. Step 5: Check for Doneness Check one piece. It should flake easily with a fork. If you have a meat thermometer, the internal temperature should be 145°F (63°C). Salmon is not just delicious; it is a nutritional powerhouse. If you are tracking your macros or looking for a heart-healthy meal, here is a quick breakdown of why these salmon bites are a great choice for your body:” Nutrient Benefit for You Omega-3 Fatty Acids Supports heart health and improves brain function. High Quality Protein Essential for muscle repair and keeping you full longer. Vitamin B12 Helps boost energy levels and supports nerve health. Potassium Helps manage blood pressure and reduces stroke risk. Troubleshooting: Common Mistakes to Avoid Even with easy air fryer recipes, things can go wrong. Here is how to fix them: Flavor Variations (Customize Your Meal) One of the best things about this recipe is that it is a blank canvas. Here are three popular variations you can try: 1. Honey Garlic Glaze (The Crowd Pleaser) Mix honey, soy sauce, and minced garlic in a small bowl. Brush this sauce onto the salmon bites during the last 2 minutes of cooking. This is sweet, sticky, and delicious. 2. Spicy Cajun (For Heat Lovers) Replace the paprika

The Ultimate Guide to Soup Recipes: Nourishing Your Soul One Bowl at a Time
Recipes

The Ultimate Guide to Soup Recipes: Nourishing Your Soul One Bowl at a Time

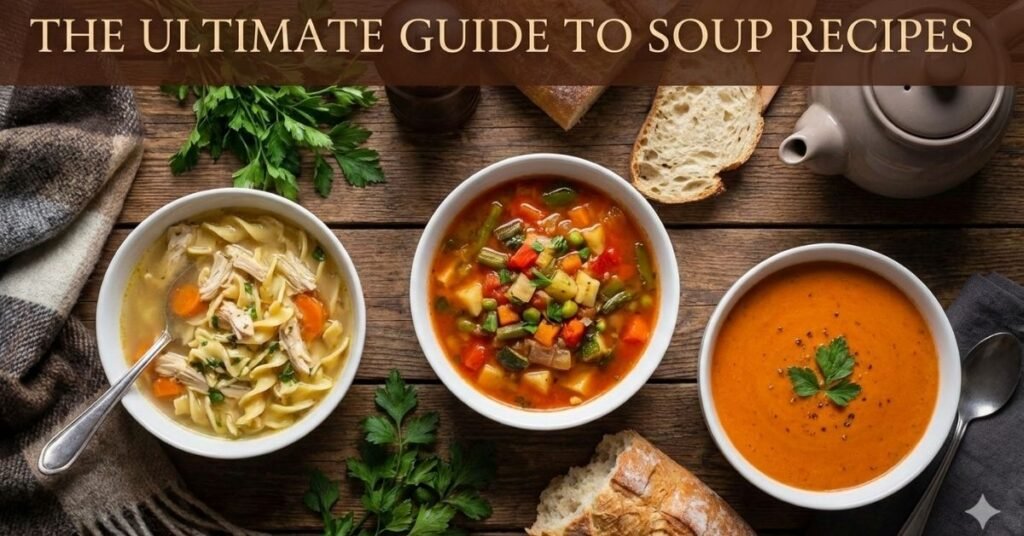
Editor’s Note: > “Welcome to my kitchen! I’ve spent months perfecting these soup recipes to ensure they are easy enough for a busy weeknight but delicious enough for a family dinner. Soup has always been my go-to comfort food, and in this article, I’m sharing my personal ‘secret’ techniques to help you master the perfect broth. I hope these recipes bring as much warmth and health to your home as they do to mine.” Kiran There is something undeniably magical about a simmering pot on the stove. Whether it is the rhythmic bubbling of a broth or the aromatic steam filling the kitchen, soup is more than just a meal,it is a universal language of comfort. In a world of fast food and instant snacks, winter comfort food like a well-crafted soup offers a return to slow, intentional, and healthy eating. “As a professional nutritionist, I’ve spent years analyzing meal plans, and I can confidently say that soup is one of the most underrated tools for health. Whether you are looking to shed a few pounds, improve your digestion, or simply find comfort on a chilly evening, a well-balanced soup covers all bases. In my kitchen, a pot of simmering broth isn’t just a recipe; it’s a commitment to wellness.” 1. Why Soup is the Ultimate Superfood Before diving into the recipes, it is essential to understand why soups have been a dietary staple for centuries. Soup allows you to consume a high volume of vegetables and proteins in a form that is easy for the body to digest. Quick Comparison: Popular Soup Bases Soup Type Primary Benefit Best For Bone Broth High in Collagen & Minerals Joint health and gut healing Vegetable Stock Low Calorie & High Fiber Weight loss and detoxification Cream-Based High Energy & Comfort Satiety and cold winter nights Clear Broth Hydration Recovery from illness (Cold/Flu) 2. The Classic: Easy Chicken Soup When you are feeling under the weather or simply need a “hug in a bowl,” an easy chicken soup is the gold standard. This recipe focuses on simplicity and high-quality ingredients. Ingredients Checklist: Instructions: 3. Hearty & Healthy Vegetable Soup Recipes Vegetable soups often get a bad reputation for being “thin.” However, by using the right techniques, you can create a hearty meal that even meat-eaters will crave. Here are some one-pot soup ideas to keep your kitchen clean and your belly full: Top Vegetables for Richer Flavor: Nutritional Value (Per Serving) Below is a quick breakdown of the average nutritional content for the recipes mentioned in this guide. Soup Type Calories Protein Fiber Main Benefit Chicken Soup 210 kcal 18g 2g Muscle Recovery & Immunity Mixed Veggie 120 kcal 4g 6g Digestion & Weight Loss Lentil (Daal) 180 kcal 12g 8g Long-lasting Energy Tomato Soup 150 kcal 3g 4g Calculate My Calories 4. Pro-Level Secrets: How to Thicken Your Soup One of the most common questions in soup recipes is how to achieve that perfect “restaurant-style” consistency. Thickening Methods Comparison Table Method Technique Best Used In Roux Flour and butter cooked together Creamy soups (Chowders) Slurry Cornstarch mixed with cold water Clear soups (Corn Soup) Pureeing Blending a portion of the veggies Bean or Potato soups Grains Adding oats, barley, or rice Broth-based stews Pro Nutritionist Tip: If you want to boost the nutrient density of any soup without changing the flavor, blend in half a cup of cooked white beans or red lentils. This adds a creamy texture and a massive hit of plant-based protein and fiber without the need for heavy dairy creams. 5. Troubleshooting: Common Soup Mistakes Even expert chefs can run into trouble. Here is how to fix common issues: 6. Storage and Food Safety  To ensure your homemade soup for cold storage is safe, follow these expert guidelines: Conclusion Whether you are seeking winter comfort food to survive the chill or looking for easy chicken soup to heal a loved one, mastering these basics will make you a hero in the kitchen. Remember, soup is an art, not just a recipe—don’t be afraid to taste, adjust, and experiment! (FAQs) Q1: What is the secret to a flavorful soup? The secret is “layering.” Don’t just boil everything at once. Sauté your onions and aromatics first, deglaze the pan with a little liquid to pick up the browned bits, and then add your broth. Q2: Can I make these soup recipes in a Slow Cooker? Absolutely. Most one-pot soup ideas are perfect for slow cookers. Simply add all ingredients (except dairy and fresh herbs) and cook on “Low” for 6-8 hours. Q3: How do I make my soup vegetarian but still “meaty”? Use “Umami” rich ingredients. Adding soy sauce, nutritional yeast, dried mushrooms, or a parmesan rind to a healthy vegetable soup recipe provides a deep, savory flavor similar to meat. Q4: Is soup actually good for a cold? Yes. Scientific studies suggest that chicken soup can inhibit the movement of neutrophils (white blood cells that cause inflammation), effectively reducing upper respiratory cold symptoms. Q5: Which soup is best for weight loss? Broth-based vegetable soups are best. They have low energy density but high volume, meaning they fill you up for very few calories. Author Note;Kiran is a professional nutritionist and the founder of prepslim.com. With years of expertise in meal prepping and health blogging, she is dedicated to helping people achieve their fitness goals through nutrient-dense, science-backed recipes that don’t compromise on flavor. Disclaimer: The nutritional information provided in this blog is for educational purposes only. If you enjoyed these recipes, check out my guide on [Healthy Meal Prep for Beginners] to save even more time during the week!

How to Lose Belly Fat in 30 Days Without Exercise: A Complete Guide
Weight Loss & Diet Plans

How to Lose Belly Fat in 30 Days Without Exercise: A Complete Guide

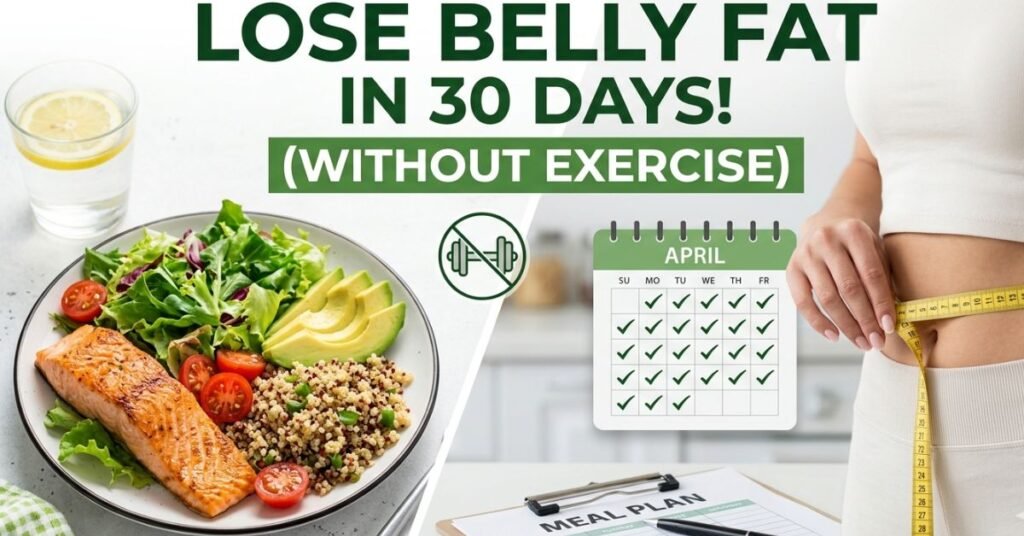
Are you trying to figure out how to lose stubborn belly fat, but you just do not have the time, energy, or ability to hit the gym every day? You are certainly not alone. Many people mistakenly believe that hours of exhausting workouts and heavy weightlifting are the only ways to get a slimmer waistline. But as a professional nutritionist, I want to share a widely accepted industry secret with you: a flat stomach is built in the kitchen, not just in the gym. In my daily practice, I have helped countless clients lose weight naturally by making smart, calculated changes to their daily routines. The truth about weight loss is that it is 80% diet and 20% lifestyle. By following a structured and mindful flat stomach diet plan, you can see very real, noticeable changes in just one month. Let’s dive into exactly how you can melt away that unwanted belly fat in 30 days without doing a single push-up or sit-up. The Science Behind Losing Fat Without the Gym Before we look at the exact steps, it is important to understand how your body actually stores and burns fat. To lose body fat, your body needs to enter a state called a “caloric deficit.” This simply means you need to consume fewer calories through food and drinks than your body burns just to stay alive and function daily. When you are in a caloric deficit, your body realizes it is not getting enough energy from food, so it turns to your stored fat for fuel. However, all calories are not created equal. Eating a 200-calorie donut is very different from eating 200 calories of grilled chicken. Foods that are very high in refined sugars and bad fats cause your blood sugar to spike rapidly. When this happens, your body releases a large amount of a hormone called insulin. Insulin’s main job is to lower your blood sugar, but it also acts as a fat-storage hormone. By controlling what you eat, you can keep insulin levels low, which forces your body to burn fat instead of storing it around your midsection. 1. Master Your Diet (The 80% Rule) If you want a successful belly fat diet, you must focus on whole, single-ingredient, nutrient-dense foods. Here is a breakdown of the dietary changes you need to make: 2. Implement Intermittent Fasting (The 16/8 Method) Intermittent fasting is one of the easiest and most effective ways to reduce tummy fat without working out. It is not about what you eat, but when you eat. The most popular and beginner-friendly method is the 16/8 rule. This means you fast for 16 hours straight and eat all your daily meals within an 8-hour window. 3. Smart Hydration and Detox Strategies Proper hydration is a highly underrated tool for weight loss. Sometimes, our bodies confuse the feeling of thirst with the feeling of hunger. 4. Optimize Your Sleep and Manage Stress Did you know that poor sleep can actually make you gain weight, even if you eat perfectly? When you are sleep-deprived or highly stressed, your body produces excess amounts of a stress hormone called cortisol. High cortisol levels are directly linked to increased fat storage, specifically in the abdominal area. Building healthy eating habits is crucial, but you also must commit to getting 7 to 8 hours of high-quality sleep every single night. Additionally, try to manage your daily stress by reading a book, practicing deep breathing, or simply taking a 15-minute quiet walk in the evening. The 30-Day Fat Loss Progression Plan To keep you on track, I have designed this simple week-by-week focus plan. Do not try to change everything on day one. Slowly build these habits. Week Primary Focus Daily Action Step Expected Result Week 1 Sugar Detox & Hydration Stop all liquid calories. Drink 2.5 to 3 liters of water daily. Less bloating, feeling lighter. Week 2 Protein & Portion Control Add a protein source to every meal. Fill half your plate with veggies. Reduced cravings, stable energy. Week 3 Timing Your Meals Start the 16/8 Intermittent Fasting schedule (e.g., eat 12 PM – 8 PM). Accelerated fat burning. Week 4 Sleep & Consistency Ensure 8 hours of sleep. Stick strictly to the diet plan. Visible reduction in waist size. Nutrition Swap Guide: What to Eat and What to Avoid Making the right choices at the grocery store makes all the difference. Use this table as your daily shopping guide. Food Category Avoid These (Causes Fat Storage) Eat These (Promotes Fat Loss) Carbohydrates White bread, pasta, sugary cereals, pastries Oats, sweet potatoes, quinoa, brown rice Proteins Processed sausages, deep-fried chicken, salami Whole eggs, grilled chicken breast, lentils, fish Beverages Regular soda, packaged fruit juices, energy drinks Plain water, green tea, black coffee, lemon water Snacks & Fats Potato chips, milk chocolate, baked cookies Almonds, walnuts, avocado, Greek yogurt Final Thoughts Losing belly fat without exercise is completely achievable if you are disciplined and patient. Focus on clean eating, stay perfectly hydrated, and give your body the rest it desperately needs. Remember, consistency is the ultimate key to success. Stick to this structured plan for the next 30 days, trust the process, and you will absolutely love the results you see in the mirror. (FAQs) 1. Can I really lose belly fat in a month without any exercise at all? Yes, it is entirely possible. Weight loss is primarily driven by your diet. If you strictly maintain a caloric deficit, eat high-protein meals, and control your insulin levels by avoiding sugar, you will definitely see a visible reduction in your waistline within 30 days. 2. Which drinks can help burn fat while I am sleeping? While no magic drink burns fat instantly, certain beverages can boost your metabolism and improve digestion overnight. Chamomile tea, warm water with a pinch of cinnamon, or ginger tea are excellent choices to drink before bed. They soothe the stomach and help lower stress levels. 3. Does eating late at night cause belly fat?

Scroll to Top