Editor’s Note: This article was updated on October 22, 2026, with a clearer food safety section, improved timing tips, two new sections, and approximate nutrition information for the recipes.
Your air fryer can do much more than crispy fries. It can also cook eggs to a perfect soft, jammy, or hard-boiled texture without a single drop of boiling water.
In this guide, you’ll get an exact timing chart, step-by-step instructions, two easy recipes, and fixes for common problems. The method is simple: hot air cooks the egg evenly at a gentle 250°F (120°C), and an ice bath finishes the job so the shell slips off easily.
Why the Air Fryer Method Wins
Traditional boiling depends on a pot of water coming to a steady boil. The air fryer skips that step. It heats up quickly and holds a steady temperature, which makes results easy to repeat.
Why many people like this method:
- Consistent: Same time and temperature give similar results each batch.
- Efficient: Cook one egg or a dozen without waiting for a big pot to boil.
- No mess: No water to boil over, no pot to scrub.
- Hands-off: Set the timer and walk away.
Air Fryer vs. Stovetop: Which Is Better?
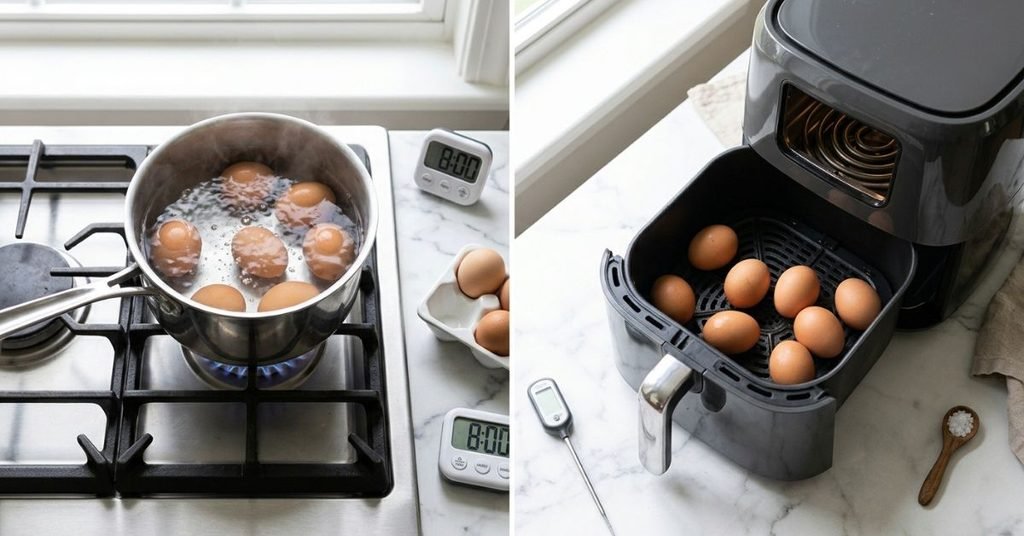
Both methods give you a good boiled egg, so the best choice depends on your kitchen habits. On the stovetop, you need a pot, enough water, and time for that water to come to a boil before the timer even starts. In the air fryer, there is no water to heat, no pot to wash, and no risk of boil-over. Many people also find it easier to cook just one or two eggs this way, since you don’t have to heat a whole pot for a small batch.
The trade-off is that air fryers vary from brand to brand, so you may need a test run to find your ideal time. Stovetop boiling is more predictable if you already have a routine that works. If you want a simple, low-mess method with minimal supervision, the air fryer is a great option to try.
1. The Master Timing & Temperature Chart
The secret to success is the 250°F (120°C) setting. Higher temperatures can lead to rubbery whites and scorched shells. Use this table as your definitive guide:
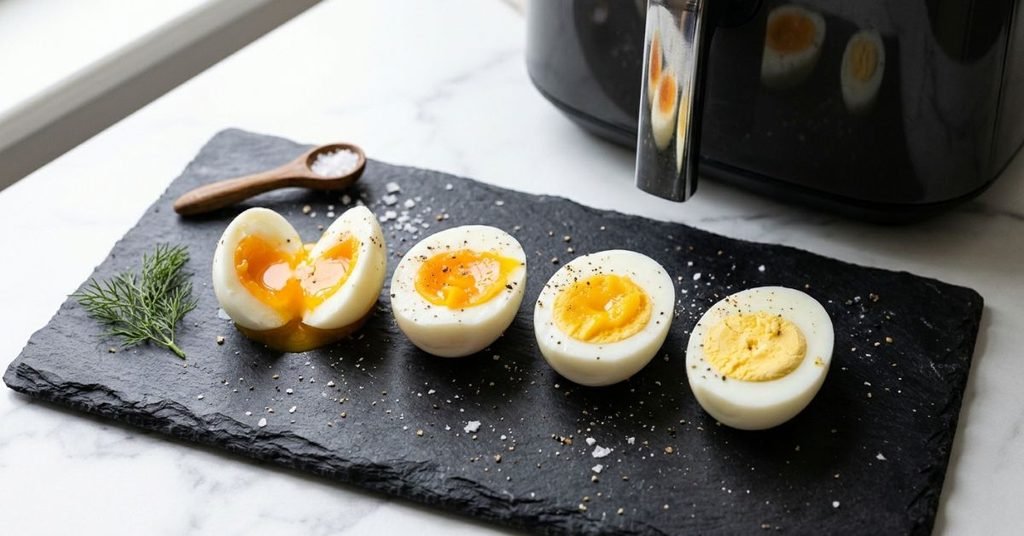
| Desired Result | Time at 250°F (120°C) | Texture Description | Best Used For |
| Soft Boiled | 9 – 10 Minutes | Liquid gold yolk, set whites | Toast soldiers & Dipping |
| Jammy Eggs | 11 – 12 Minutes | Custard-like, creamy center | Ramen & Avocado Toast |
| Medium Boiled | 13 Minutes | Fully set but tender yolk | Niçoise Salads |
| Hard Boiled | 15 Minutes | Firm, pale yellow yolk | Deviled Eggs & Meal Prep |
Note: Every air fryer heats a little differently. Do a test run with 1-2 eggs first and adjust the time by a minute or two until you find your perfect result.
2. Essential Tools and Ingredients
Before you start, ensure you have the following ready:
- Eggs: Large, straight from the refrigerator.
- Air Fryer: Any model works (Ninja Foodi, Cosori, Instant Vortex).
- Tongs: To safely remove hot eggs.
- Ice Bath: A bowl filled with 50% ice and 50% cold water.
3. Step-by-Step Instructions
Step 1: Loading the Basket
Place your eggs in the air fryer basket in a single layer.
- Tip: Do not stack eggs.
- Tip: No preheating is required for this method.
Step 2: Setting the Controls
Set the temperature to 250°F (120°C). Select your time based on the chart above. For most beginners, 12 minutes for a jammy egg is the perfect starting point.
Step 3: The Thermal Shock (Ice Bath)
When the timer dings, move quickly!
- Fill a bowl with ice and water.
- Use tongs to transfer eggs into the ice bath.
- Let them sit for at least 5 to 10 minutes.
Step 4: Peeling
Gently tap the egg all over on the counter, then roll it lightly under your palm. Start peeling from the wider end, where the air pocket is. The ice bath helps the egg cool quickly, which makes peeling easier. Eggs that have been in the fridge for about a week also peel more easily than very fresh ones.
4. Exclusive Air Fryer Egg Recipes
Recipe 1: The “Gourmet” Jammy Egg Avocado Toast

This recipe is the perfect showcase for the air fryer soft boiled eggs technique, delivering a rich, custard-like yolk every time.
- Prep time: 2 minutes
- Cook time: 12 minutes
- Servings: 1
Ingredients:
- Eggs: 2 Large eggs (straight from the fridge).
- Bread: 1 Thick slice of artisanal sourdough or whole-grain bread.
- Base: ½ Ripe avocado.
- Acid: 1 tsp fresh lemon juice (to add zest and keep the avocado from browning).
- Seasoning: Sea salt, cracked black pepper, and Red Chili flakes.
- Optional Topping: A drizzle of Extra Virgin Olive Oil or Sriracha.
Instructions:
- Air Fry: Place the eggs in the air fryer basket and cook at 250°F (120°C) for 12 minutes.
- The Shock: Immediately move the eggs to a prepared ice bath for 5 minutes.
- The Toast: While the eggs cool, toast your sourdough until golden and crisp.
- The Mash: Mash the avocado directly onto the toast. Squeeze a little lemon juice on top to add zest and prevent browning.
- Assemble: Peel the eggs carefully. Slice them lengthwise to reveal the “jammy” center and place them atop the avocado.
- Garnish: Sprinkle with sea salt, pepper, and chili flakes. Serve immediately.
Approximate nutrition per serving: 370 calories | 18 g protein | 25 g fat | 20 g carbs
(Values are estimates and vary with bread and portion size.)
Recipe 2: Healthy High-Protein Air Fryer Egg Salad

Using the easy peel hard boiled eggs air fryer method, this recipe provides a clean, high-protein meal perfect for lunch or post-workout snacking.
- Prep time: 10 minutes
- Cook time: 15 minutes
- Servings: 2
Ingredients:
- Eggs: 6 Hard-boiled eggs (Air fried for 15 minutes).
- Binder: ¼ Cup Plain Greek Yogurt (a healthy alternative to heavy mayonnaise).
- Flavor: 1 tbsp Dijon mustard and 1 tsp Apple Cider Vinegar.
- Crunch: 1 stalk of finely diced celery and 2 tbsp chopped fresh chives.
- Spices: ½ tsp Paprika, salt, and pepper to taste.
Instructions:
- Air Fry & Peel: Cook 6 eggs at 250°F (120°C) for 15 minutes. After a 10-minute ice bath, peel them and chop them into bite-sized chunks.
- The Dressing: In a medium mixing bowl, whisk together the Greek yogurt, Dijon mustard, vinegar, and paprika until smooth.
- Combine: Add the chopped eggs, diced celery, and chives into the dressing.
- Fold: Gently fold the ingredients together. Ensure the eggs are coated but not mashed into a paste to maintain texture.
- Serve: Season with salt and pepper. Serve inside a lettuce wrap, on top of crackers, or in a whole-wheat sandwich.
Approximate nutrition per serving (serves 2): 240 calories | 20 g protein | 14 g fat | 5 g carbs
(Values are estimates and vary with ingredients used.)
5. Troubleshooting Common Issues
Even with the best guide, things can go wrong. Here is how to fix them:
- Brown Spots on Shell: This is a harmless reaction of minerals. The egg inside is safe.
- Green Ring Around Yolk: This means you overcooked the egg or skipped the ice bath. Reduce time by 1 minute next time.
- Difficult to Peel: This usually happens with extremely fresh farm eggs. Try eggs that have been in your fridge for a week.
- Egg Cracked During Cooking: This is rare but can happen if there was a hairline crack in the shell before starting.
6. Pro-Tips for Success
- Test your machine: Fan speed and heating differ between brands (Ninja, Cosori, Instant Vortex and others). Always start with 1-2 test eggs.
- Use cold eggs: Cook eggs straight from the fridge for consistent timing.
- Don’t overcrowd: Keep eggs in a single layer so hot air flows around each one.
- Storage: Store unpeeled hard-boiled eggs in the fridge for up to 7 days.
Meal Prep Tips: Making the Most of Your Boiled Eggs
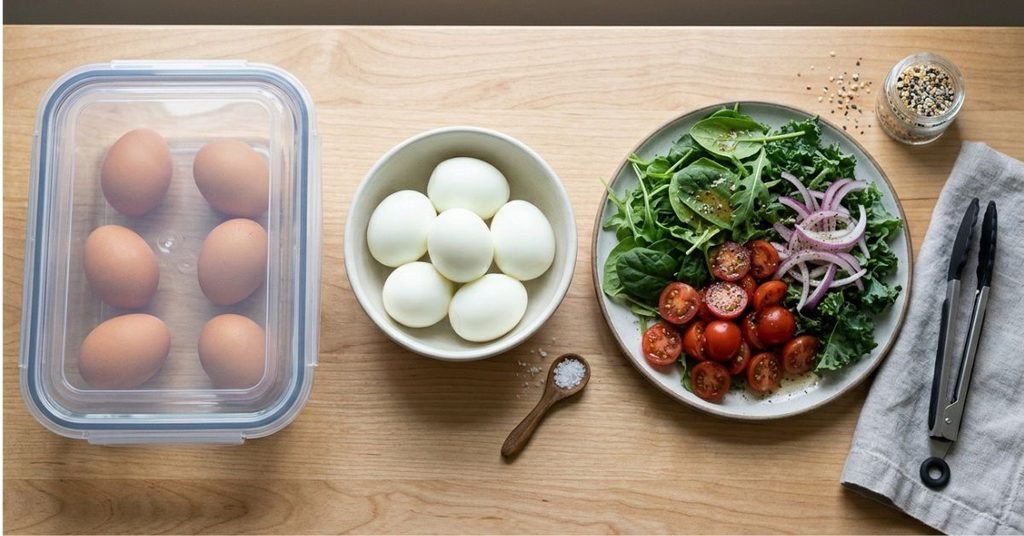
Hard-boiled eggs are one of the easiest foods to prepare ahead of time. A large egg has roughly 70 to 80 calories and about 6 grams of protein, which makes it a handy option for people who want a filling snack or a protein boost. Cook a batch at the start of the week, cool them in an ice bath, and store them unpeeled in an airtight container in the fridge for up to 7 days.
When you’re ready to eat, you can slice them over a salad, mash them into the egg salad recipe above, or pair a couple with fruit or whole-grain toast for a quick breakfast. For best results, peel eggs just before eating, as the shell helps keep them fresh.
Conclusion
Mastering no-water boiled eggs is a transformative skill for any home cook. By following these precise timings and the mandatory ice bath step, you eliminate the mess and the guesswork. Whether it’s for breakfast, a quick snack, or a sophisticated salad topping, your air fryer is officially the best way to “boil” an egg.
Frequently Asked Questions (FAQs)
Q1: Can I cook 12 eggs at once?
Yes. As long as they are in a single layer. The air fryer egg hack works for any quantity that fits comfortably in your basket.
Q2: Is it safe to cook eggs without water?
Yes. Scientific studies show that as long as the internal temperature reaches 160°F, the eggs are safe to consume. Convection heat is just as effective as conduction (boiling water).
Q3: Why 250°F instead of 400°F?
Cooking at high heat makes the proteins in the egg whites tough and rubbery. Low and slow (250°F) keeps them tender.
Q4: Do I need to flip the eggs?
No. The air fryer circulates air 360 degrees around the eggs, so they cook evenly without being moved.
Author’s Note: I’m Kiran, and I write simple, practical recipes and meal prep guides for everyday kitchens. The timings in this post are a reliable starting point, but every air fryer heats a little differently, so test with one or two eggs first and adjust to suit your machine.